
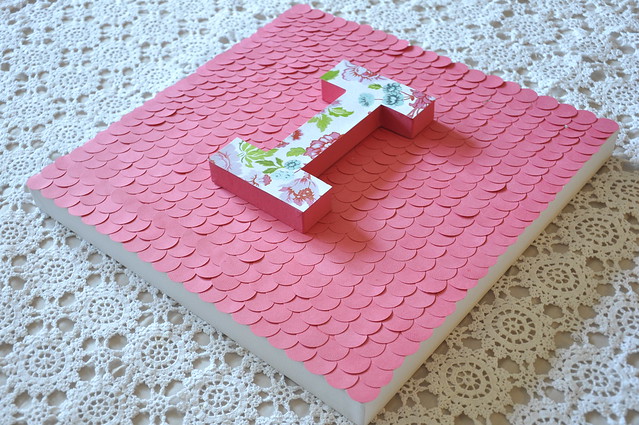
It might look difficult but it is super easy. It is a little time consuming covering the canvas in circles but that is the hardest it gets. I put together a little step by step below for anyone who might want to give one a go! You'll need - a canvas, paper mache letter, paint, plain & printed scrapbooking paper, glue & paintbrushes.
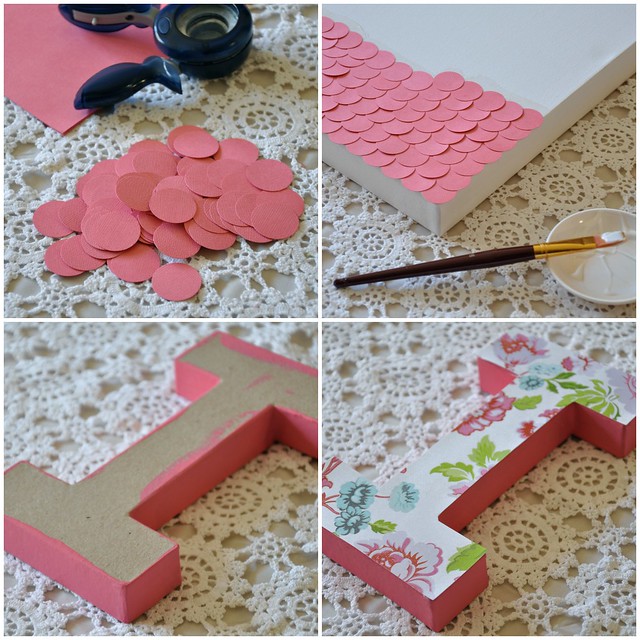
1 - Using a circle punch make as many circles as you can from your plain scrapbooking paper. I bought 5 sheets but only used 1/4 of the last sheet. My canvas was 41cmx41cm.
2 - Glue your circles to your canvas. I found the easiest way to do this was with a paintbrush. I just went row by row painting the glue and sticking down circles. Make sure you always start on the same side of your canvas and work from the bottom to the top.
3 - Paint the edges of your letter with your paint. You only need to paint the sides as the back and front won't show. Set aside to dry.
4 - Once dry trace the shape of your letter onto the backside of your patterned paper. Cut the shape out and glue onto the front of your letter. Trim the edges of the paper if needed.
5 - Now set both your letter and canvas aside to dry completely overnight. I did this to make sure the circles were securely adhered to the canvas before sticking the letter on. The next day glue your letter into the middle of your canvas and your done.
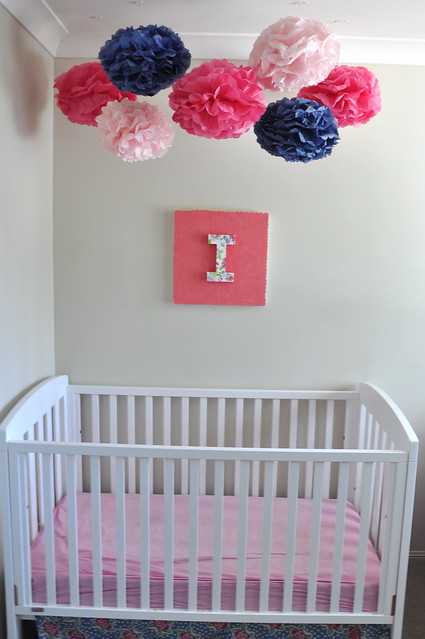
Imogen's new piece of wall art is now hanging proudly over her cot. I am so happy with how it turned out. Just one tip - if you are hanging this over a bed make sure you secure it properly so it won't fall onto anyone sleeping below. I use 3M hooks to hang everything around our house and have never had any issues with them coming off.
So sweeeeeet!
ReplyDeleteLove the texture of the circles.
ReplyDeletelooks so pretty, especially with the paper pompoms <3
ReplyDelete